Wrox: Beginning Sharepoint Designer 2010: Chapter 5

[Chapter 5: Styles and Themes]

image

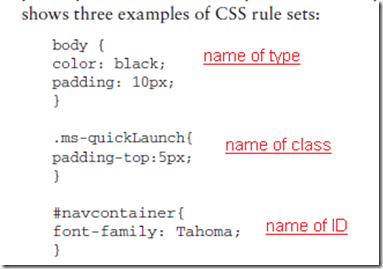
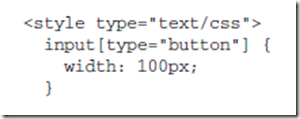
Attribute selector: Select all input with type=”button”
image

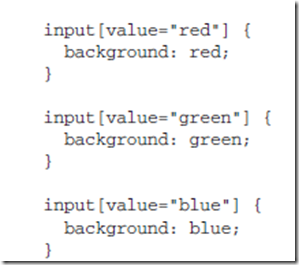
Attribute selector: all inputs value=red/green/blue
image

Attribute selectors are case-sensitive for all attribute except TYPE (you can say “button” or “BUTTON”). The Value is always case sensitive.

This matches both type and class:
 image

When specifying a unit or measure of a CSS property, do not leave space between number and unit. Such as 100px

Best approach for managing styles: using external style sheet.

SharePoint’s default external CSS file: core4.css

*** Sharepoint Designer’s CSS Tools, Page 151

Wrox: Beginning Sharepoint Designer 2010: Chapter 4

[Chapter 4: Publishing Pages]

Web content management (WCM) is a set of processes that lets you manage the life cycle of the information stored and presented by your web site – where you create, customize, deploy and dispose of web content.

WCM typically include:
(1) Electronic forms
(2) Approval workflow
(3) Scheduling workflow to ensure that the content is displayed, reviewed and removed from view on a timely basis.
(4) Templates to ensure visual consistency.

In Sharepoint 2010, the WCM is called publishing features.

Two site templates that are most relevant to the publishing features:
(1) Publishing Portal and
(2) Enterprise Wiki.

Creating a site collection via one of these two templates enables publishing features automatically.

*** activating Publishing in a Team Site via web interface
Site Actions –> Site Settings –> Site Collection features
image

The same feature at the site level also needs to be activated.

** Publishing Pages —

3 Page types are available:
Site pages,
Application pages,
Publishing pages (once you activate Publishing Feature) – which is also called
Content Pages

Difference between Publishing and Non-Publishing pages, is that the former are composed of three parts –
(1) content
(2) master page
(3) layout

A page layout is an ASPX page that defines the layout of content. In some way, it is like a master page within a master page.

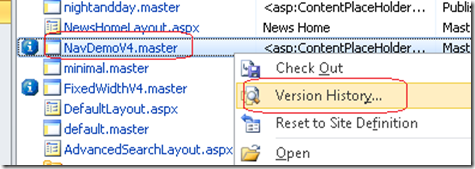
Right click a file (master page) and “Version History”, you can restore a previous file. Check out the file first.
image

both the master page and page layout are saved in Master Pages Gallery (for a team site type and others)
image

Files in this library has the following attributes:
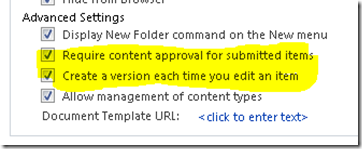
(1) Versioning is turned on by default; major/minor versions are tracked. Draft item security is enabled so only users who can edit the item can see them.
(2) Content approval is required for new/edited item. Note: During site customization, turn this off, and disable checkout requirements, until you’re done with your work!!!
(Site Actions –> site Settings –> Master Page Gallery –>Library settings –> Version settings, or you can do it from SPD)

image

image

(3) Document checkout are required.
(4) permission are set for this document library.

For a Publishing Site, the Master page and Layout are in two difference views in SPD:
image 

Page 119 – Editing the Example Publishing Master Page

default publishing master page – nightandday.master
dichotomy – similar to dilemma

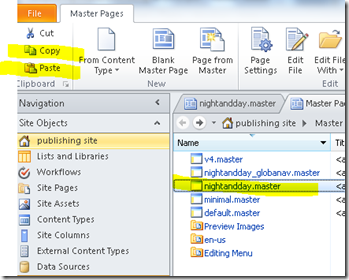
Another easy way to copy/paste a master page
image

If you want to create a custom master page, the Starter Master page is a good choice. Import it and modify.

** Page Layout —

Page layout allows you to control the positioning of content on a publishing page by placing controls in areas on the page.  

*** The content type designated for a specific page layout determines the elements that are available for display on any pages that inherit from that page layout.

** Virtually every object in Sharepoint has a content type.

Content types contains columns that define particular aspects of a piece of content.

Only Site Content Types can be used as the basis for Publishing Pages.

A specific page layout is associated with a content type.

— Creating a publishing page from start to end – you’re now creating a new publishing page, with workflow, custom page layout, custom content type

First, create custom page layout content type. Use Article page layout as a basis as it’s close to what you’re doing.

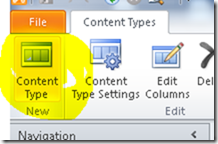
Open SPD 2010, open a Publishing site, click on Content Type.  Select new content type:
image

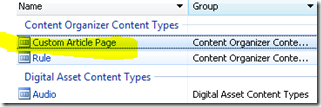
Give it a name “Custom Article Page” and OK. Then you see the new custom content type in the window. Now we need to add a new column to it. (You need to add a new site column “Article Abstract”, which is a multi-line text) 
image

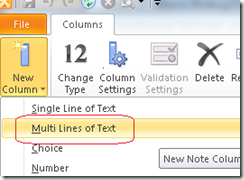
Add a new site column, click on the Site Column, and New Column –> Multi Lines of Text
imaget

So now you have a new Custom Content type (Custom Article Page), and a new site column (Article Abstract). Add the new site column to the new content type.  

Go to the new content type’s setting page:
image

Click Edit Content Type Column

image

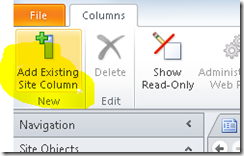
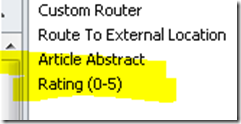
Click add Existing Site Column, then select Article Abstract to add. Done. Also add Rating.
image

So you have this in the new content type:
image

*** Creating a Custom Page Layout (assign the new content type to this new layout)
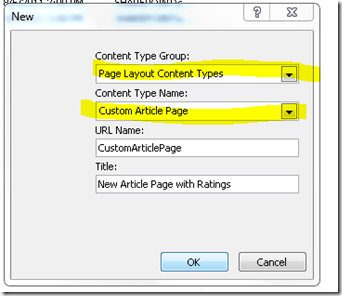
Click Page Layout –> New Page Layout.

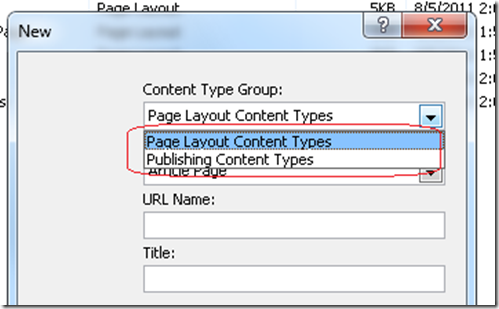
When you select a Content Type for a page Layout, you’re only allow to select a layout from either of these two groups – so make sure you save your new content type under either of them.
image

This completes creating a new Page Layout with a new content type.
image

*** Field Controls (??) – We will add Ratings and Article Abstract controls to your page layout.

Open ArticleLeft.aspx (existing page layout), copy and paste the content to you new layout (NewsArticlePagewithRatings.aspx), and the save it. Move cursor to the end of this tag:
image

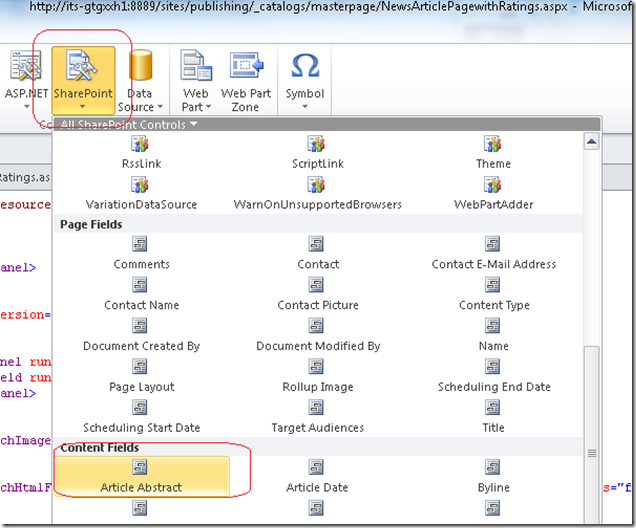
There, insert Article Abstract from menu. it’s a site column we added.
image

Now you can create a page based on the new layout (NewsArticlewithRatings).  

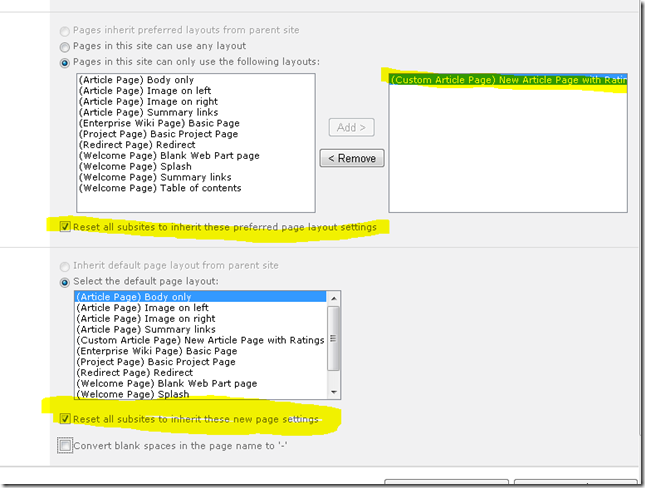
First you need to define the default layout as he NewsArticlewithRating
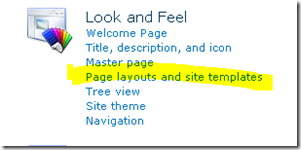
Site Actions –> Site Settings –> Page Layouts and Site Templates
image

Select layouts available for this and subsites.
image

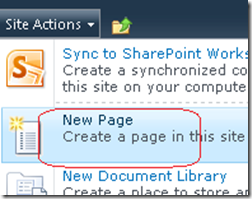
Create new page: Site Actions –> New Page
image
Enter page name.

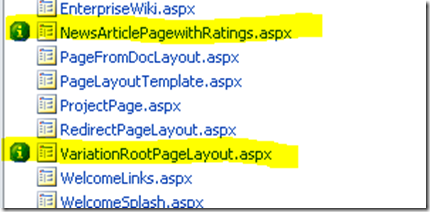
When you see in SPD a blue icon next to a file name (master page, layout etc.), it means it’s customized.
image

Page 137, 08/09/2011, 09:12PM

Wrox: Beginning Sharepoint Designer 2010: Chapter 1, 2, 3

[Chapter 1: Exploring Sharepoint Designer]

All Sharepoint sites are created based upon a site definition, or a template. A template defines the features available by default in that particular type of site. these typically include pre-defined lists and libraries, special pages and default contents. In SPD 2010, Site template area shows certain common Sharepoint templates that you may use to create a new site. You can connect to another SP server to retrieve site templates, and create a new site on your local SP server.

You can add/remove users from Sharepoint groups in the Site Groups link on the side menu.

image

With a publishing page, you can’t edit the page in SPD 2010. Only the layout. Content cannot be edited in SPD in a Publishing web site.

** Site assets are files that can be used in multiple places within the site. may include images. style sheet files, even videos.

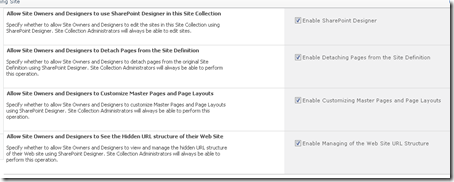
Governing Sharepoint Designer – restricting SPD access to SP web site:
Two levels:
Web application level:
Central Admin –> General Application Settings –> Sharepoint Designer
image

Site collection level:
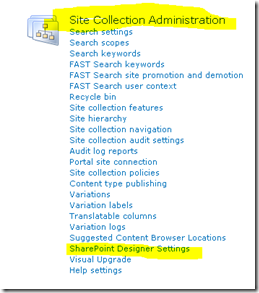
Site Settings –> Site Collection Administration –> SPD settings

image

Both are similar to this:
image

[Chapter 2: Editing Pages]

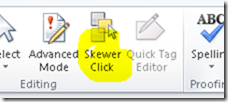
Skewer Click – If you want to select a specific tag for a specific element on a page, this is an easier way:
image

(1) Click the Skewer Click button in the ribbon
(2) In the design view, click the element, and you will see a menu popup with all the tags that are surrounding the element.
(3) Select the tag.
(4) Once you have the tag selected, click Quick Tag Editor in the ribbon. A small windows popup
image

It’s a new feature that makes selecting and editing a tag much easier.

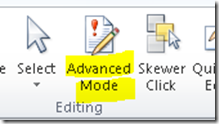
By default, SPD opens a page for edit using SAFE mode.  Only the content area can be changed. (because most of them time you won’t change the layout – such as master page tec.).  You need to click "Advanced Mode" to edit areas other than the content area.

image

Pages like Master file, are opened by default using Advanced Mode.

Code Snippets: SPD includes pre-defined codes for such thing as HTML, scripts and css link.

To save a text to code snippet:
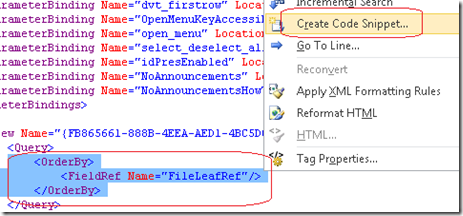
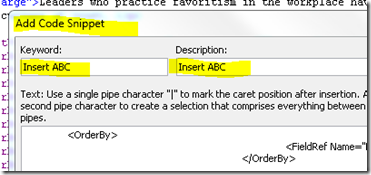
(1) Works only in code view! Highlight some text, and right click and select "Create Code Snippet". Provide name and description.
image
image

To use a code snippet:
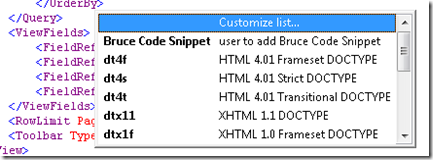
(1) In code mode, Ctrl + Enter, you will see a popup. Select the code snippet from the popup. It will be inserted.
image

You can use this tool to insert any arbitrary code that you created.

[Chapter 3: Anatomy of a Sharepoint Page]

Two page types in SP 2010:
(1) Application pages — more like traditional pages; stored in file system; can’t edit with SPD.
(2) Site pages:Pages that can be edited, add web part to, and create and customize with tools like IE or SPD.  Stored in Content DB.

most SP Content pages have the following characteristics:
(1) *.ASPX
(2) Use ASP.NET master page and "content placeholders"
(3) The placeholder "PlaceHolderMain" contains the actual instance of info for the page.

Web part page: The primary page for presenting web parts, libraries and lists. If you have unstructured content such as text, use WIKI
Web part has to be inside a web part zone. (except for WIKI)

*** You can do much more with web part page in SPD than in IE.

** Wiki page: Like web part pages, WIKI page has several layout pre-defined, but allow mix of rich content (text, image) and web part. Very versatile.

Place holders in Master page:
PlaceHolderMain
PlaceHolderLeftNavBar
PlaceHolderTopNavBar
PlaceHolderSearchArea

If you want to hide a specific content control on a page, add an empty content control, and set the Visible to False. Or, simply add an empty content control, and it will replace the default content. (such as search box)

Master page location: _catalogs/masterpage

Only one gallery (for master page) exist for one site collection. The master pages are populated when a new site collection is provisioned. Master page cannot be shared between site collections.

v4.aster: default master page for most non-publishing sites in SP 2010. Also the default system master page.

default.master: based on MOSS 2007. Use this if you need a legacy interface, and will not use Ribbon. Mainly for upgrading MOSS 2007 –> SP 2010.

minimal.master: no ribbon, no navigation; use it if you need lots of space.

simple.master: Used for Error or Login pages where no master page is needed.

nightandday.master: good for publishing web content management.

Page 86

*** Modifying the default master page: v4.master – Can be used with publishing or non-publishing site.
To create a new master page based on an existing one, you can —
(1) Export (to your local) and import the master file: — Not working for me.
image
(2) Copy/paste and rename.

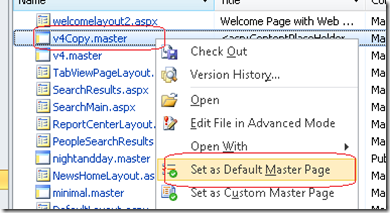
To switch master page:
image

**** Custom master page – not easy to do because you have test and make sure it works. You have to have all required placeholders even though you do not use them. There are about 35 required placeholders!

What do you do with the placeholders that you don’t need but you have to include? Hide them using Panel!
<asp:Panel visible=”false” runat=”server”></aspPanel>

Required control for Master Page to function:
<head> – SPPageMansger, ScriptLink
<body> – ScriptManager

*** How to make a fluid (full) width design to a fixed width (such as 1024 pt) design?
You will add an embedded style sheet that will fix the width of pages inheriting from this master page. Apply some CSS and you can change the width of the page. See Page 96.

*** Changing the location of the Search Box
you’re moving the PlaceHolderSearchArea content placeholder. Page 98.

*** Registering External CSS —
First, add your custom/external CSS file using SPD, and save it in the Style Library folder (you can create subfolder). Then, before the end of the Head tag in the master file, add this line to create a reference to your custom CSS file:

image

Not easy to customize Sharepoint Master Page.

Favoritism In The Workplace By Carl Mueller

Seeing favoritism in the workplace can be one of the most demotivating things you might experience.

In the workplace, favoritism refers to when someone appears to be treated better than others and not necessarily for reasons related to superior work performance.

Favoritism in the workplace might result in this person being promoted faster than others unfairly, being paid more to do the same job as others, being given more leeway to come and go during the day as they please, that sort of thing.

The end result is that they appear to be treated better than others and for no valid reason.

In each case, the favoritism they are given seems to you to correlate less to their abilities and more because they know the right person or people.

Favoritism can occur in pretty much any office environment large or small. How you react to the favoritism really depends on how blatant it is, if it’s proveable and whether or not it’s illegal. Your company’s willingness to tolerate such behavior is also key.

Before you consider going public with a complaint about favoritism think about the possible consequences.

Whistleblowers are increasingly being offered more protection in some countries but whether or not your complaint is legitimate and proveable might be the biggest obstacle and a public announcement could end up causing you long-term grief.

If the favoritism you are witnessing is holding you back or hurting you and you feel it is based on illegal reasons – race, sex, age, etc – you might consider legal action but you’d obviously need proof of wrong doing to have a case.

You might also ask if your current job is worth fighting for? Do you want to work for a company that tolerates favoritism if you can find a better opportunity elsewhere?

Depending on the specific situation, you might have a hard time proving favoritism or getting any sort of positive resolution otherwise.

Short of getting a new job, you might consider exploring other options depending on your situation such as consulting with a labor lawyer or speaking with a Human Resources rep from your company.

Also make sure you are familiar with your company’s policies towards this issue. They may have processes in place that can help you and guide you.

* Wrox Real World Sharepoint 2010 – Chapter 17

[Chapter 17: Understanding Sharepoint 2010 Search]

07/27/2011, 07:05PM, Page 605

Basically, two major engines can be used for Sharepoint 2010 Search:
(1) Sharepoint 2010 Search Engine
(2) FAST Search Server for Sharepoint 2010 (expensive)

How to deploy and configure a Sharepoint Search service application. 
(1) Go to Central Admin –> Manager Service Application, crate a new search service application.
(2) Associate your web application with the new search service application: Central Application –> Application management –> Configure service application association.
(3) In service Application Association, check/uncheck the search service application.

Search engine components:
(1) Crawler: browse the contents automatically on a regular basis. to provide up-to-date data from the data source to the indexer.
(2) Indexer: collecting and storing relavant data of crawled contents, in order to make available fast and precise information during the queries.
(3) Query: provides UI for entering the user queries, and presents the result set to the end users. It communicates with the indexer directly to get teh results for the user query, and to put the proper result set together.

Configuring crawling and building index files is the first step to building a Sharepoint 2010 search architecture.

Terms:
** Content Source: (where to search?) Three important information about a content source: the type (Sharepoint site? web site? file share?), location/address and schedule. By default there is one content source — the local Sharepoint site. You can ad multiple content sources so the crawlers can crawl.
** Crawl Rules: Include or exclude a path/address; also provide authentication if needed. use the Test button to test if the address is valid.
** Crawl Log: check each contetn source, what shoul dbe crawled, what warnings/errors etc.
** Server name mapping: Override how URL’s are displayed in the result.
** Host distribution rules: Only works for a farm with more than one crawler database; associate a host with a specific crawler databade.
** File types: What file type/extension to include in the content index?
** Crawler Impact Rules: Adjust the load the crawl applies to a specif content source (a URL/address). incuding the number of simultaneour requests, or time to wait between each request.

Role of Indexr is complicated – includes the following responsibilities:
(1) Processing the crawls
(2) making the indces available to the query servers.
(3) managing the content source properties such as location and scheduling
(4) creating and maintaining an index database.

Under Queries and Results:
* Athoritative pages: First, 2nd and 3rd level; the higher the level (1st), the higher the ranks. You can demote a web ste too.
* Federated Locations: usually remote search engines that prvide results to the queries initiated in Sharepoint 2010. But also can be local if you want to run simultaneous searches on the same content.
* Metadata properties: properties that user can use in their query, such as title: “xxxxxx”.
* Scopes: e.g., search “All Site” or “People”. (values in the drop down next to the search box)
* Search result removal: URL’s to remove from the search results.

**** Customizing Search UI:
Page 637, 07/27/2011, 09:58PM

Wrox Real World Sharepoint 2010 – Chapter 16

[Chapter 16: managing metaData with Sharepoint Server 2010]

Enterprise Managed metadata (EMM) service plays a central role when setting up both folksnomies and taxonomies, you need to configure EMM.
Taxonomy: A collection of controlled vocabulary terms organized into a hierarchical structure. Each term is taxonomy is in one or more parent/child relationship to other termsin the taxonomy.

Sharepoint 2010 provides the following supports of control vocabulary:
(1) Simple list – using a simple lookup list
(2) Synonyms – it is possible to define syninyms, abbreviations, and preferred terms using the new Managed metadata infrastructure in SP 2010.
(3) Taxonomy – Support is provided via MMI.
(4) Thesaurus and ontology – extension of taxonomy.

** taxonomy v.s. folksonomy

folksnomy: the result of adding metadata in the form of open-ended labels called tags by la large group of people. Folksonomy is a form of taxonomy that is built by the end users themselves. user add tags to contents they access on the internet, such as flickr, to make it easy to search, disover ad navigate.

typically, these tags are displayed in the form of tag clouds. SP 2010 allows a hybrid of taxonomy and folksnomy.

new features build around EMM, Enterprise Managed metadata –
(1) Managed metadata – includes built-in support for taxonomy stricutres with the managed metadata field.
(2) Term store – a central database that contains one or more taxonomies, which is referred to a term set in SP 2010.
(3) EM service – allow multiple SP web applications to consume the information stored in the term store.
(4) Location-based metadata – makes the tagging process mroe productive by adding metadata automatically.
(5) metadata navigation settings – make use of metadata values within the SP navigation menus.
(6) Document set –  support for working with multiple documents as a single work unit with support for shared metadata at the work unit level.
(7) Content organizer – automatically route documents or web pages to a specific location within Sharepoint based on content types across site collections, web applications, and even farms.
(8) Social tagging – integration of social aspect within the metadata story, because social tagging is backed by the terms store as well.

*** Managed terms — predefined by a small group of people, and are organized into a hierachy. They can be selected by users via the new [managed metadata column type]. The managed metadata column is a single column or multi-value column that binds to a term set in the term store, which works like a super choice field. Users can either fill in the textbox (which provides suggestions) or they can use the taxonomy picker control for the complete hierarchy of terms.  

Managed metadata support synonyms and abbreviations, as well as multilingual user interface (MUI).

** Enterprise keywords — like a super text fields. They allow you to enter the value, but there is still a link with the term store. because of this link with the term store, you get auto completion and preferred keywords suggestions as you start typing.

A term store can contains one or more term groups. Term groups are security boundaries. It’s at the term group that you can define term group manager and term group contributor. A term group can contain one or mroe term sets.

MMS –> Term Store –> Term Group –> Term Set –> Term — SubTerm

** Location -based metadata – In any Document Library, if you have folder defined under it, you can set the default value of specific columns/fields. Each folder (includeing the parent) can have its own default field value defined. Any Doc Library –. Library Settings –> Genreal setings –> Change Defualt Column Values

** Navigation hierarchy — hierarchical tree view that allow users to filter items in a document library or list by selecting nodes int he ree view.
** Key filters — filtering capabilities for a specific fields with buil-in type ahead.
(these are the (1) tree view adn (2) search box that are available ont he left side of a document library)
(Metadata navigation and filtering is a site features and needs to be activated first)
To manage, Library setting –> Metadata navigation settings.

** Document Set –
(1) binds multiple docs together
(2) provide a welcome page
(3) Enable to link a number of content types to the doc set.
(4) add default doc to a document set.
(5) Create version snapshot.
(6) Define workflow at the document set level.

**** First, go to Site Settings –> Site content types to add new instances of Document Set. Each document set instance is unique with its own document template, so make the name descriptive. After you create new Document set instance, configure it with different document template, and later you can add this new Document Set as a Content Type in a library. When you open new document in that library, all these template will be added to the library as a SET.

*** Content Organizer — Auto routing. It was only available in Record Center in SP 2007 but now it’s available everywhere.
(1) content  organizer not only route document based on content types, but also based on other metadata attributes, it will even build a folder structure based on these metadata.  Use content organizer rule to define the routing logic.
(2) COntent organizer is available in all sites.

Must activate the Content Organizer at the site level.  This will enable two links in the Site Administration: Content ORganizer settings and Content Organizer Rules.

Content organizer page settings:
(1) automaticallt redirect to Drop off Library
(2) allow sending to other sites
(3) partition folders
(4) determine what to do with duplicate submissions — append unique chars, or simply use the built-in versionining>
(5) Preserve context to include audit log and properties with the submission,
(6) Define rule managers that must sort out content that did not get routed correctly
(7) Determine submission points – the URL of the web service that allows 3rd-party applications to interact with the content organizer.

When you activate Content Organizer feature, a new doc liobrary — Drop Off Library is created.

In Content Organize settings: Reuiqre user to use the organizer to submit document when at least one rule is defined and point to the library? Allow rules to specify another site as a target location? Create subfolders after target location has too many files? (How many files? foldername format?), how to handle duplicate submission? (Sharepoint versioning, append unique chars), and rule manager? Also, the submission poin (URL) of this Context Organizer.

In Content organizer Rules: Rule name, active?  priority? Select content type, destination library? Create a folder based on the unique value of a property?

*** Content Type Syndication — central management of content types, while providing the capability to publish (syndicate) these content types to multiple site collections (even on other web applications or farms). This means that Sharepoint 2010 enables up-to-date and consistent content type schemas.

A content type that is syndicated is referred to as Enterprise Content Type. Follow these steps to enable content type syndication:
(1) Define a content type hub by going to the MMS (manage service application). Enter the URL of the hub site collection, check the box that report syndication error.

Terms:
(1) Hub – a site collection designated as a “source” from which we share content types throughout the enterprise.
(2) Content type syndication — publishing, sharing, pushing one or more content types across site collection, web app and farms.

True value of content type syndication – create a data element that has metadata, workflow and policies attached to the data content and publish it to the hub, and from there, syndicate it to all web applications, site collections and sites.

— Publishing content type: Content types are created within Gallery, and then are published from a ‘normal” content type to a “hub” within MMS. Each MMS gets one hub for content type syndication, if you need more than one hub, you need another MMS.

— what is published/shared along with the content type?
(1) content type itself and all columns
(2) document set content type
(3) policies
(4) workflows association — but not the workflow themselves! (you will need to amke surethe workflwo exists inthe cunsumer site – they will re-associate the WF with the syndicated content type) If no workflow is available, then no workflow is attached and that’s fine.

From the hub, you can: PUBLISH, UNPUBLISH 9will not affect local copy), REPUBLISH
From the Consumer you can:
(1) Extend a published content type: consuming sites can add more columns to the content type.
(2) Derive from a publish content type. (inherit the published version to create a new CT)
(3) View import errors
(4) Refresh all syndicated content types

How:
(1) In the site collection that you will use as a Hub, enable the site collection feature “Content Type Syndication Hub”.
(2) In an existing MMS (or create a new one), update the property to set the hub address to this site collection (hub). Once this is set, it cannot be changed.

*** Social Tagging — allows user to add keywords to content. These keywords are an addition to the metadata provided by the content contributors.

In Sharepoint 2010, authoriative tagging (managed metadata) and social tagging use the same backend — term store. This means that the term will be stored within the term store with a specific GUID.
 

Wrox Real World Sharepoint 2010 – Chapter 15

[Chapter 15: Using Performancepoint service 2010]

PerformancePoint 2010 provides the capability to create rich, interactive dashboards that allow Info Worker to view and work with structured and unstructured data in a secure and easy-to-consume format.

PPS (PerformancePoint servic) is now a service application in Enterprise Sharepoint 2010.

** Unattended Service Accountread access to all data stores that will be used with content such as reports, scorecards, and filters. PPS Dashboard Designer uses this account to access the data during the authoring of a dashboard. Another one is Unattended Execution Account – access data during run time and must be configured in advance. You store these accounts in Secure Store (hence Secure Store Service).

To configure Unattended Service Account –> Central Admin –> Manage service Applications –> PPS service –> PPS setting –> Enter Credentials

** Configure trusted locations: PPS stores content that includes reports, scorecards, filters, KPIS, indicators, data connections, and dashboard inside of the listand libraries configured for PPS data sources and content. PPS data sources are stored in Data Connection Library (DCL). PPS Content is stored in sinatances of PPS Content list.

PPS will only recognize trusted libraries and lists!!! it’s a security feature so admin can decide where PPS can retrieve or store data.

You can configure to trust all Sharepoint locations (default) or specific Sharepoint locations for:
(1) Data source
(2) Content
Both are configure in the same place (Where you configure PPS in Central Admin)

Sharepoint 2010 has a default site template for PPS — BIC – Business Intelligence Center.

For a site collection ot use PPS feature, you need to activate it in Site Collection Feature.

What is required to run PPS at client side: .NET 3.5 SP1, Silverlight (not required but better),  

** Creating a PPS dashboard:

*** Normally you need to create a BIC site before you can install PPS Dashboard Designer, but if you don’t have access to a BIC site and still want to install Dashboard Designer, you can access this address: http://<yourservername>/_layouts/PPSWebParts/DesignerRedirect.aspx you wull be prompted to install the DD.
** Need to activate Publishing feature at site collection level before creating a BIC site.
07/20/2011, 10:49PM, Page 562

Creating data source for PPS content. Data sources are created in Dashboard Designer and are stored in a library int he workspace. The list/library must be based on the Data Connection Library for PerformancePoint. Don’t get this confused with other DCL!!!!!

Wrox Real World Sharepoint 2010 – Chapter 14

[Chapter 14: Business Connectivity services]

7/19/2011, 09:37PM, Page 525

MOSS 2007 BDC (Business Data Catalog) – allows you to define business data that was available from databases and web services, and them reuse it or display it in Sharepoint.
Sharepoint 2010 – BCD (Business Connective Services) has replaced BDC.

*** ECT : External Content Types: a description of the data and BCS methods that make up a real-world object, such as Customer, Order,or Product.
The BCS methods that make up ECT:
** Finder (readlist)
** SpecificFinder (readitem)

In Sharepoint 2010, BCS’s improvement overMOSS 2007 BDC:
(1) BCS integration is available in all versions of Sharepoint 2010 (Including Foundation)
(2) Out-of-the-box BCS is now write-back. You can SELECT/INSERT/UPDATE/DELETE. Also availabl ein Sharepoint UI.
(3) External List = Sharepoint List +  BCS
(4) Can now use a .NET assembly as a data source. Write C# or VB.NET Code that brings data together from multiple data sources, mixes and merges, and bring to Sharepoint via BCS.
(5) Tools for BCS: (1) Sharepoint SPD (which can configure BCS for SQL Server, WCF or SOAP), and (2) pre-eployed .NET model. VS 2010 comes with a BCSModel project item type, which helps to build (1) BCS model and (2) .NET assembly to get at the data.

(Custom) if you want your ECT to be able to update or insert, you must define Updater and Creator. You will see the Update or Insert button in the ribbon.

*** With external list, you can’t do these: Workflow, alerts, RSS feeds, folders, attachments. It makes sens becuase you are linking to an external system.

** External Data Column: allows you to create a column for you list or library that will look up the information defined in an ECT, and reuse this as metadata against documents and list items saved in Sharepoint. To use External Data column, you must have Finder and SpecificFinder method.

** Business Data Web Parts —

07/20/2011, 09:35Pm, P.551

Wrox Real World Sharepoint 2010 – Chapter 12

[Chapter 12: Amanaging the Sharepoint Application Lifecycle]

Application Lifecycle management (ALM) has various definitions and perspectives. For Sharepoint developers, a key ALM challenge would be to deploy application through multiple environments. Sharepoint applications are typically built using the Features framework, and deployed using solution package. This allows modules of functionalities to be made available to different scopes within Sharepoint, which is called Provisioning

*** Sharepoint site template files are *.wsp.

How to import features to VS 2010:
(1) in Sharepoint site, Site Actions –> Site settings –> Save site as a template. Once done, the file (*.wsp) will be available in Solution Gallery.
(2) Create a [Import Sharepoint Solution Package] project, and then check/uncheck the feature you want. Uncheck [Include Data]. manually copy/paste the feature XML you need. Treat this import project like a temporary one. You can do the same thing again next time if you need it.

*** When web parts are included in an imported WSP, web part properties are stored in binary file. They still can be deployed, but can’t modified.

Wrox Real World Sharepoint 2010 – Chapter 11

[Chapter 11: Building Custom service Applications for the Right Situations]

Sharepoint 2010 service application is to replace Sharepoint 2007 SSP (Shared Service Providers). Provide much more flexibility in terms of deployment, management, topology and capabilities.

In Sharepoint 2010, each service application is set up indenpendently. We application can now associate with individual service applications, rather than a collection (unlink MOSS 2007). Service application are installed on all servers in the farm, but the admin are free to decide which server independently (e.g., which server to run which service applications). How? Central Admin –> System settings –> Manage services on server.  

Services are always consumed by Sharepoint WFE. Service applications are implemented through the use of service application proxies. All communication are done via WCF with HTTP/HTTPs. Allows cross farms communication – as loong a proxy is installed and trust configured. You can build a custom service apllication – such as an anti-virus service and the admin can decide which server to run the serveice –

Building a custom service application and service application proxy — will probably never need it – so skip this chapter now.
07/19/2011. 08:36PM Page 407